


Usually, it takes time for Bitcoin transactions to be confirmed on the blockchain. Increasing the transaction fee increases the chance that your transaction will be confirmed faster, but you still need to wait a few minutes. This is not sustainable if you want to accelerate the adoption of bitcoin, so we need a technology that makes bitcoin transactions fast and inexpensive, hence Bitcoin Lightning Network Node (LND) was introduced.
The Bitcoin Lightning Network Node is a layer 2 technology built on the bitcoin blockchain that enables smaller, relatively quick payments between users at a very cheap cost. It eliminates the need for every transaction to go through Bitcoin Node while still ensuring that the value being transacted adheres to Bitcoin's rules. read more on the Bitcoin lightning node
In this article, I will show you how to set up a Bitcoin Lightning Network Deamon (LND) on AWS EC2. I will be using the Lighting Lab implementation of the Lightning Network Node. The article will be divided into two parts. Part one will focus on setting up the LND and part two will discuss how to interact with it.
Note: This article is intended for developers with experience with virtual machines, bitcoin core, bash scripts, etc.
Pre-requisites:
- Have a running ubuntu ec2 instance.
- Have bitcoin full node(testnet or mainnet depending on environment ).
First your bitcoin.conf should have the following
testnet=1
server=1
txindex=1

//The Rpc Configuration
rpcuser=username
rpcpassword=randompassword
rpcallowip=0.0.0.0/0
rpcport=18432
rpcbind=0.0.0.0:18432
port=18432

//Zeromq configuration
zmqpubrawblock=tcp://0.0.0.0:28334
zmqpubrawtx=tcp://0.0.0.0:28335
zmqpubhashtx=tcp://0.0.0.0:18831
zmqpubhashblock=tcp://0.0.0.0:18832
Step One: Install Go
To install the LND we first need to install GO, since the Lighting Labs LND was built on GO(Go is a programming language).
// to download the GO
wget https://dl.google.com/go/go1.19.1.linux-amd64.tar.gz

// extract/install file to /usr/local
sudo tar -C /usr/local -xzf go1.19.1.linux-amd64.tar.gz
Set up $GOPATH environment path. Simply put, this means that LND and lncli can now be used directly without specifying their locations.
export PATH=$PATH:/usr/local/go/bin
export GOPATH=~/go
export PATH=$PATH:$GOPATH/bin
to make your env permanent, open your .profile , go to the last line an paste the following
// open your profile file
sudo nano ~/.profile

//paste this
export GOPATH=~/go
export PATH=$PATH:$GOPATH/bin
Step Two: Install Lightning Network Daemon (LND)
We need to clone the LND library from their GitHub repo, checkout to the stable branch, and build/compile its dependencies
// Clone the LND repo
git clone https://github.com/lightningnetwork/lnd

//move to lnd directory
cd lnd

// checkout to the latest stable branch
git checkout tags/v0.15.0-beta

//Install the lnd dependencies
make install

Step Three: Configure Lightning Network Daemon (LND)
We’ll create a lnd.conf file in the ~/.lnd directory and set some configuration instructions to make LND work with Bitcoin Core.
Note: LND works independently(off-chain), but it relies on bitcoin rules and securities implementation, so you need to configure LND with a bitcoin core to work
// create .lnd directory
mkdir ~/.lnd

//move to .lnd directory
cd .lnd

//create lnd.conf file
touch lnd.conf

//Open lnd.conf file with the nano editor
nano lnd.conf
Copy and Paste the following configuration
//Lets LND know to run on top of Bitcoin
bitcoin.active=1
bitcoin.testnet=1 //(change to mainnet, if your bitcoin is on mainnnet)

//Lets LND know you are running Bitcoin Core (not btcd or Neutrino)
bitcoin.node=bitcoind

//Tells LND what User/Pass to use to RPC to your Bitcoin node, <br> this is the same config you've set previously on your bitcoin core(check the first config I sent)
bitcoind.rpcuser= username
bitcoind.rpcpass=randompassword

//Allows LND & Bitcoin Core to communicate via ZeroMQ
bitcoind.zmqpubrawblock=tcp://{{your-bitcoin-core-host-public-ip}}:28334
bitcoind.zmqpubrawtx=tcp://{{your-bitcoin-core-host-public-ip}}:28335
bitcoind.rpchost={{your-bitcoin-core-host-public-ip}}

//Tell LND to listen on all of your instance's interfaces.
tlsextraip={{your-bitcoin-core-host-public-ip}}

//Tells LND where to listen for RPC messages
rpclisten=0.0.0.0:10009
note: you can use 127.0.0.1 as {{your-bitcoin-core-host-public-ip}} if you're running your bitcoin core node on the same instance as your lnd, check more LND configuration here
Step Four: Run Lnd
//Run LND as a background process
lnd &
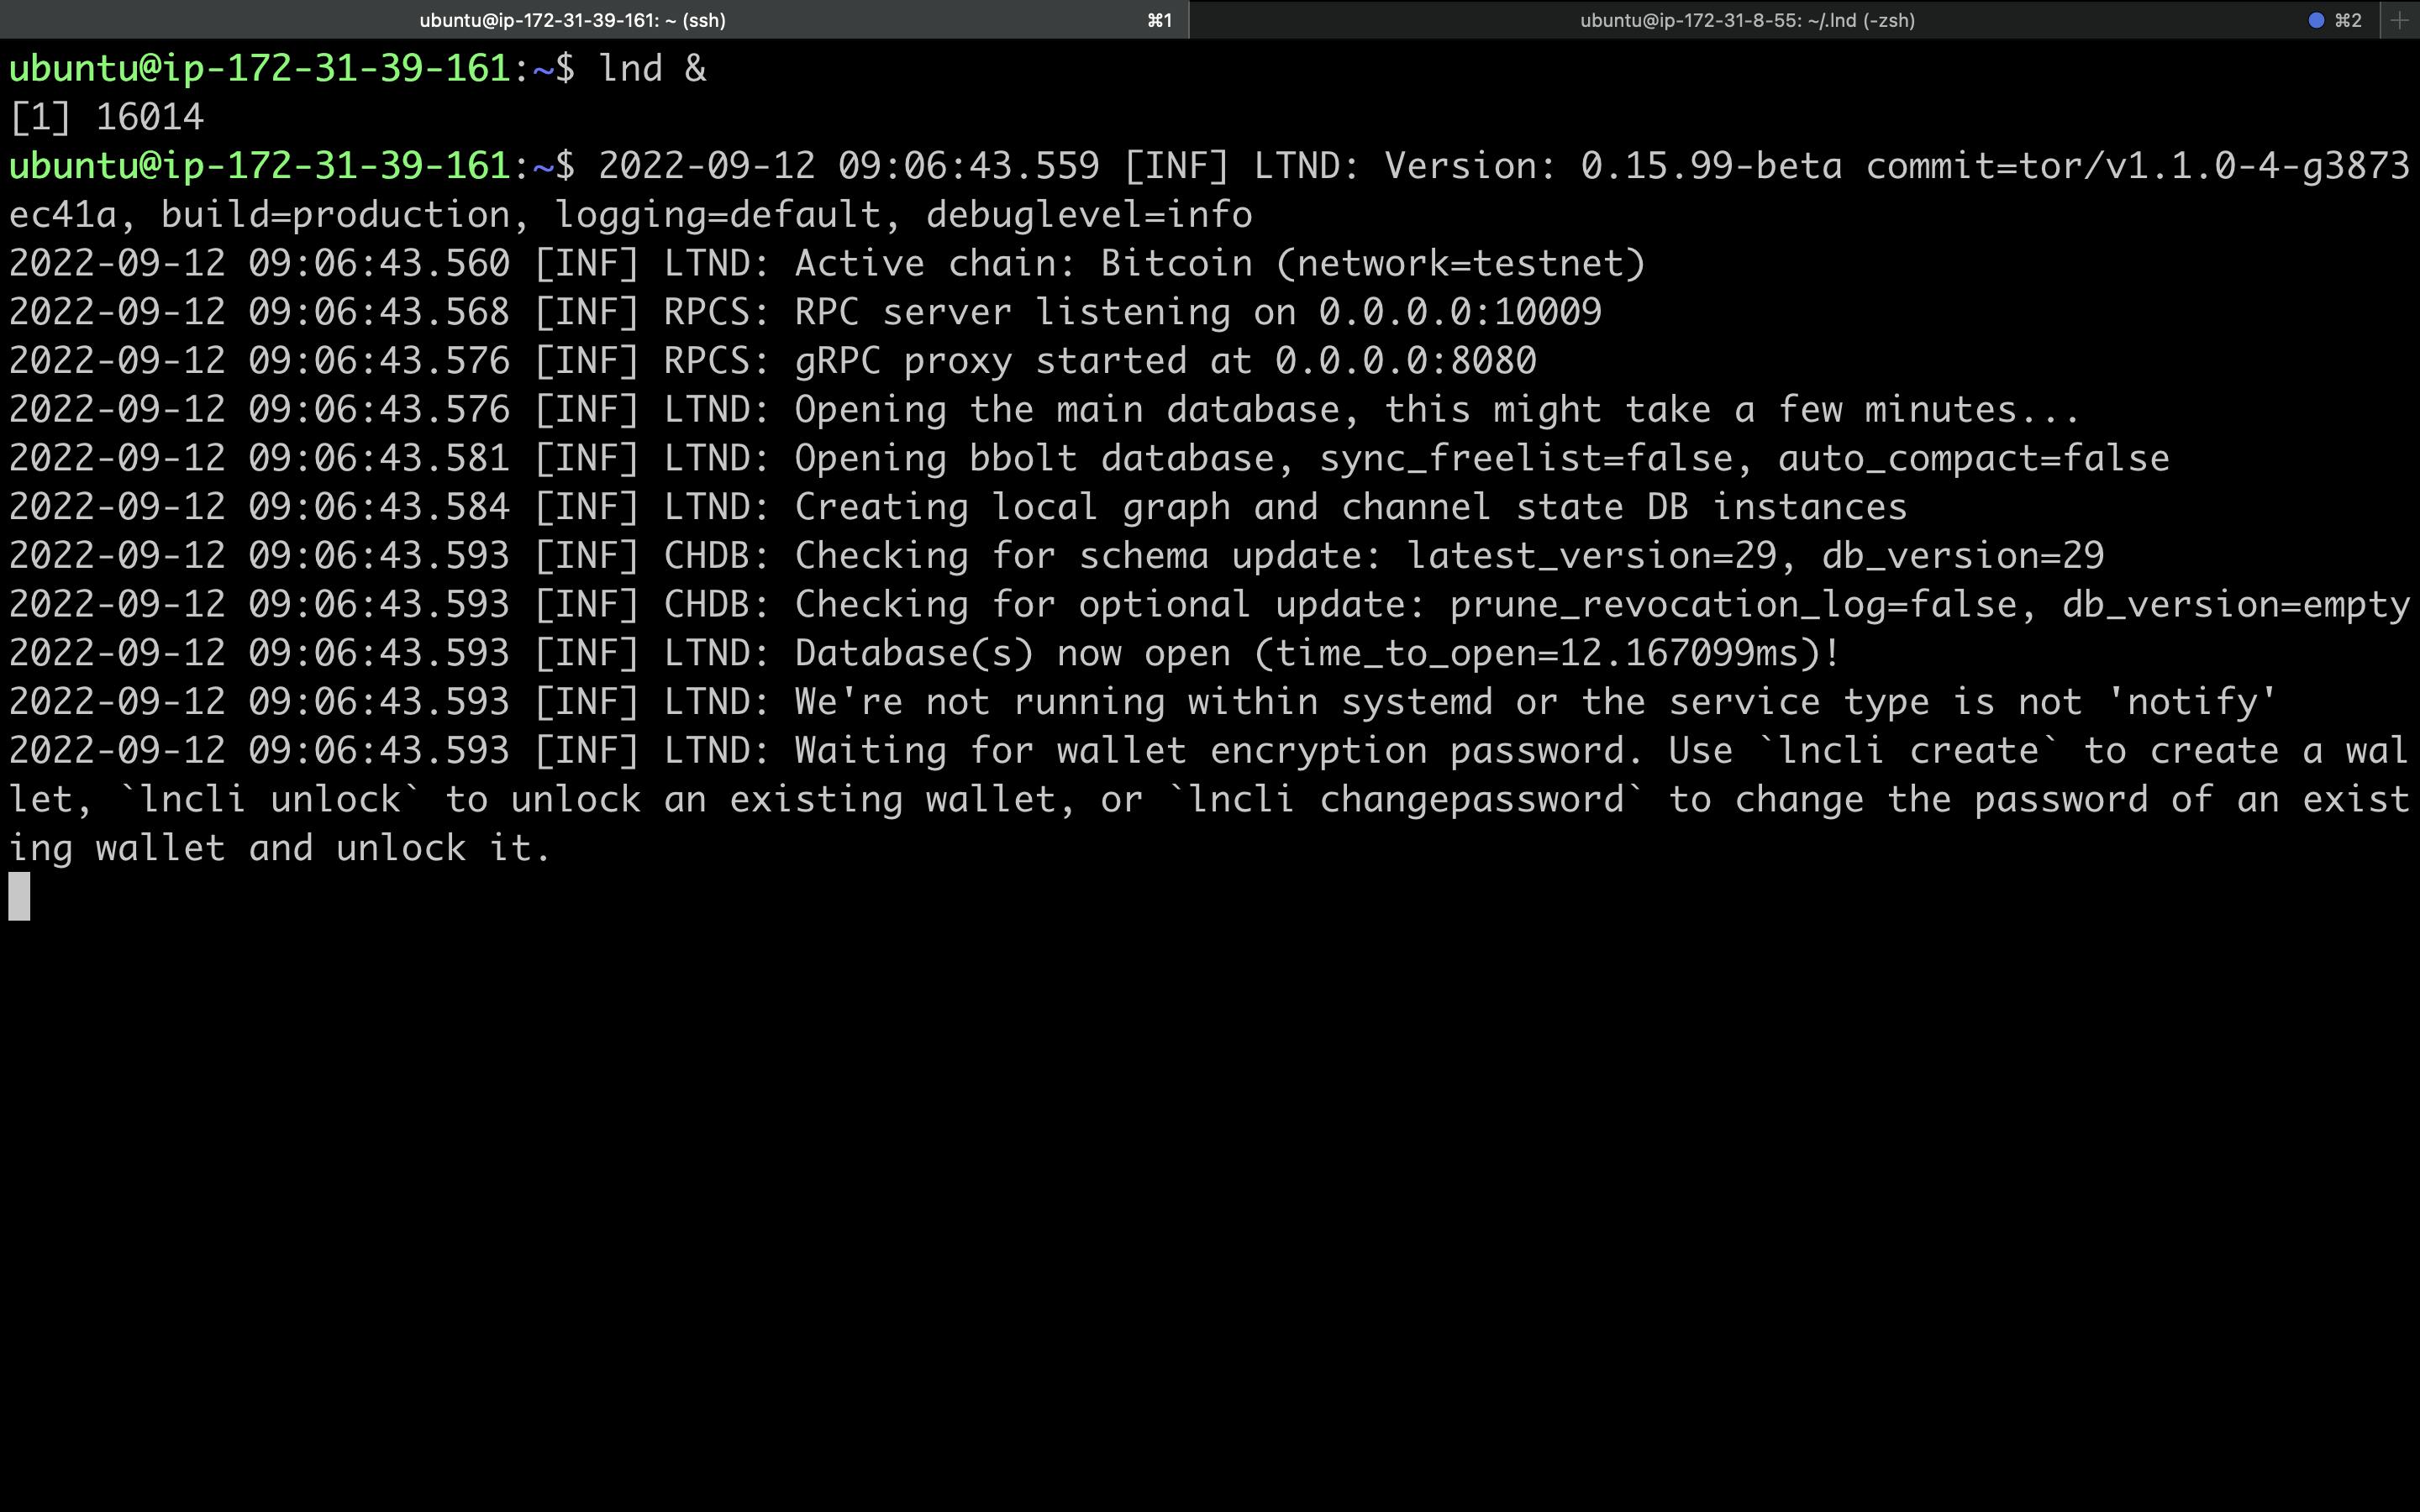
The lnd should be only called when you're trying to log in or create a new LND account, to create a new account or interact with the LND node we would be using LND inbuilt command line tool lncli.
//Create a new account
lncli create
As soon as you paste the above, you will be presented with a series of instructions to set up your password and it will generate a seed phrase for you (if you have a seed phrase previously, you may use it to generate back the account).
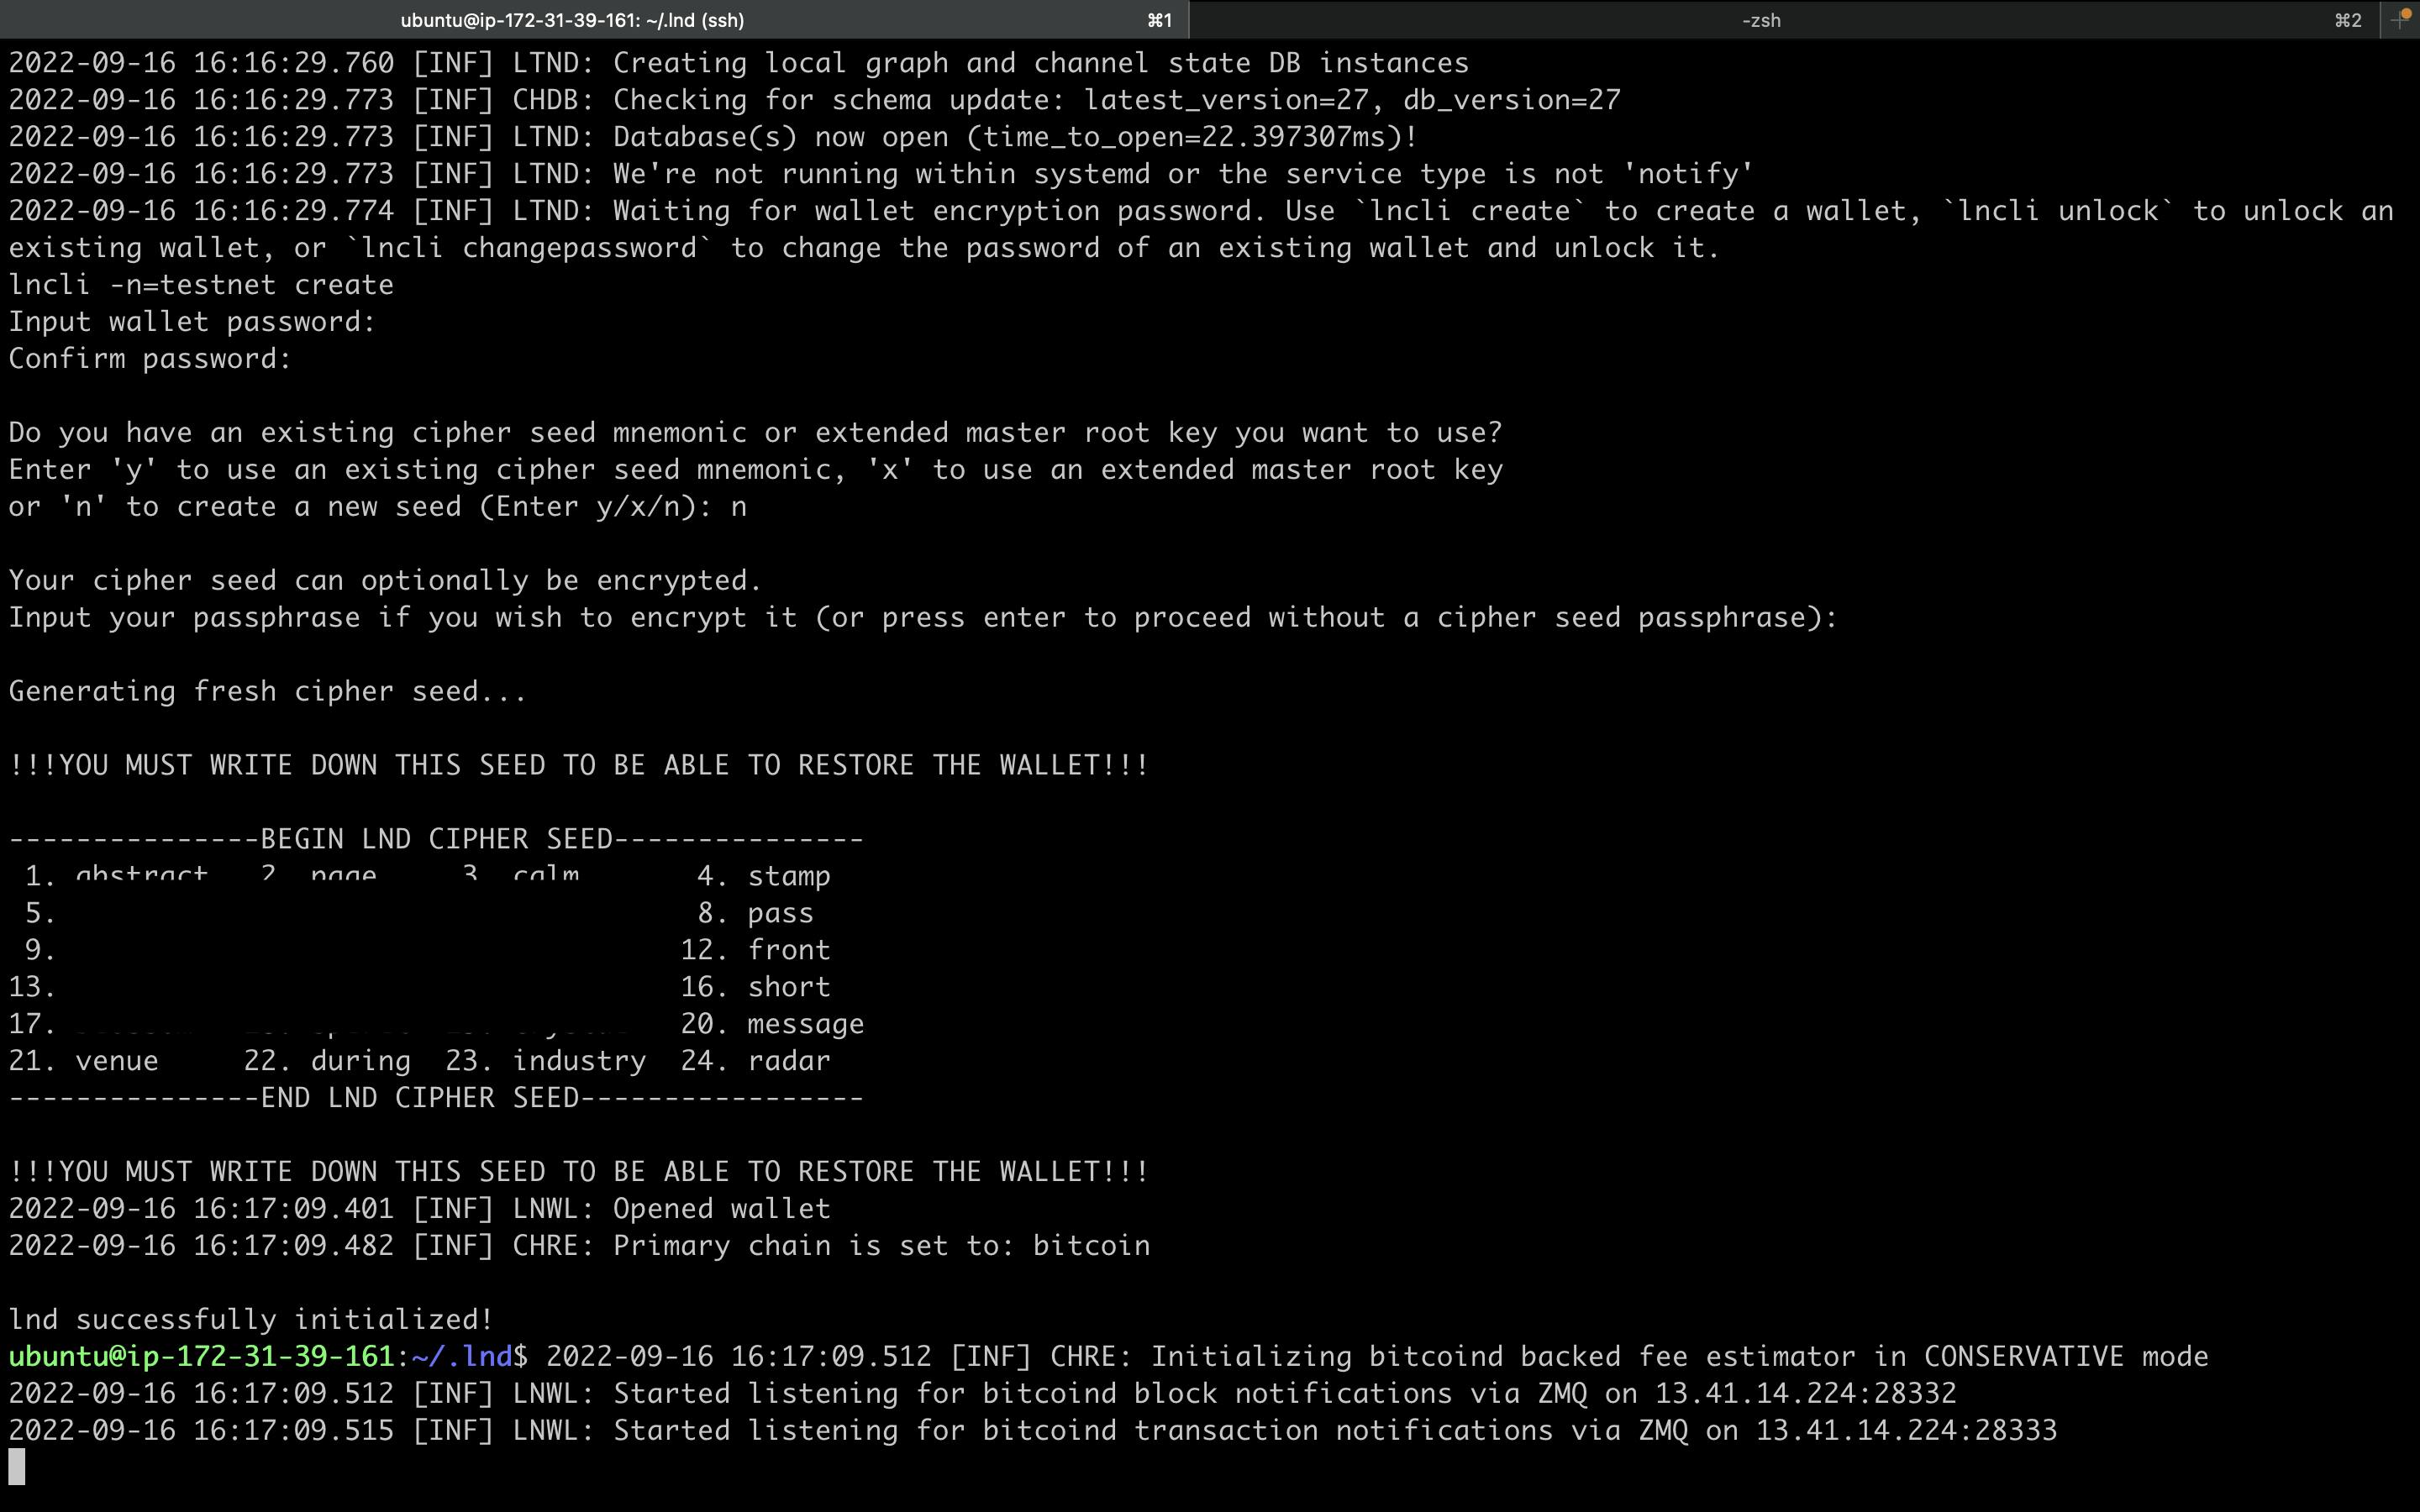
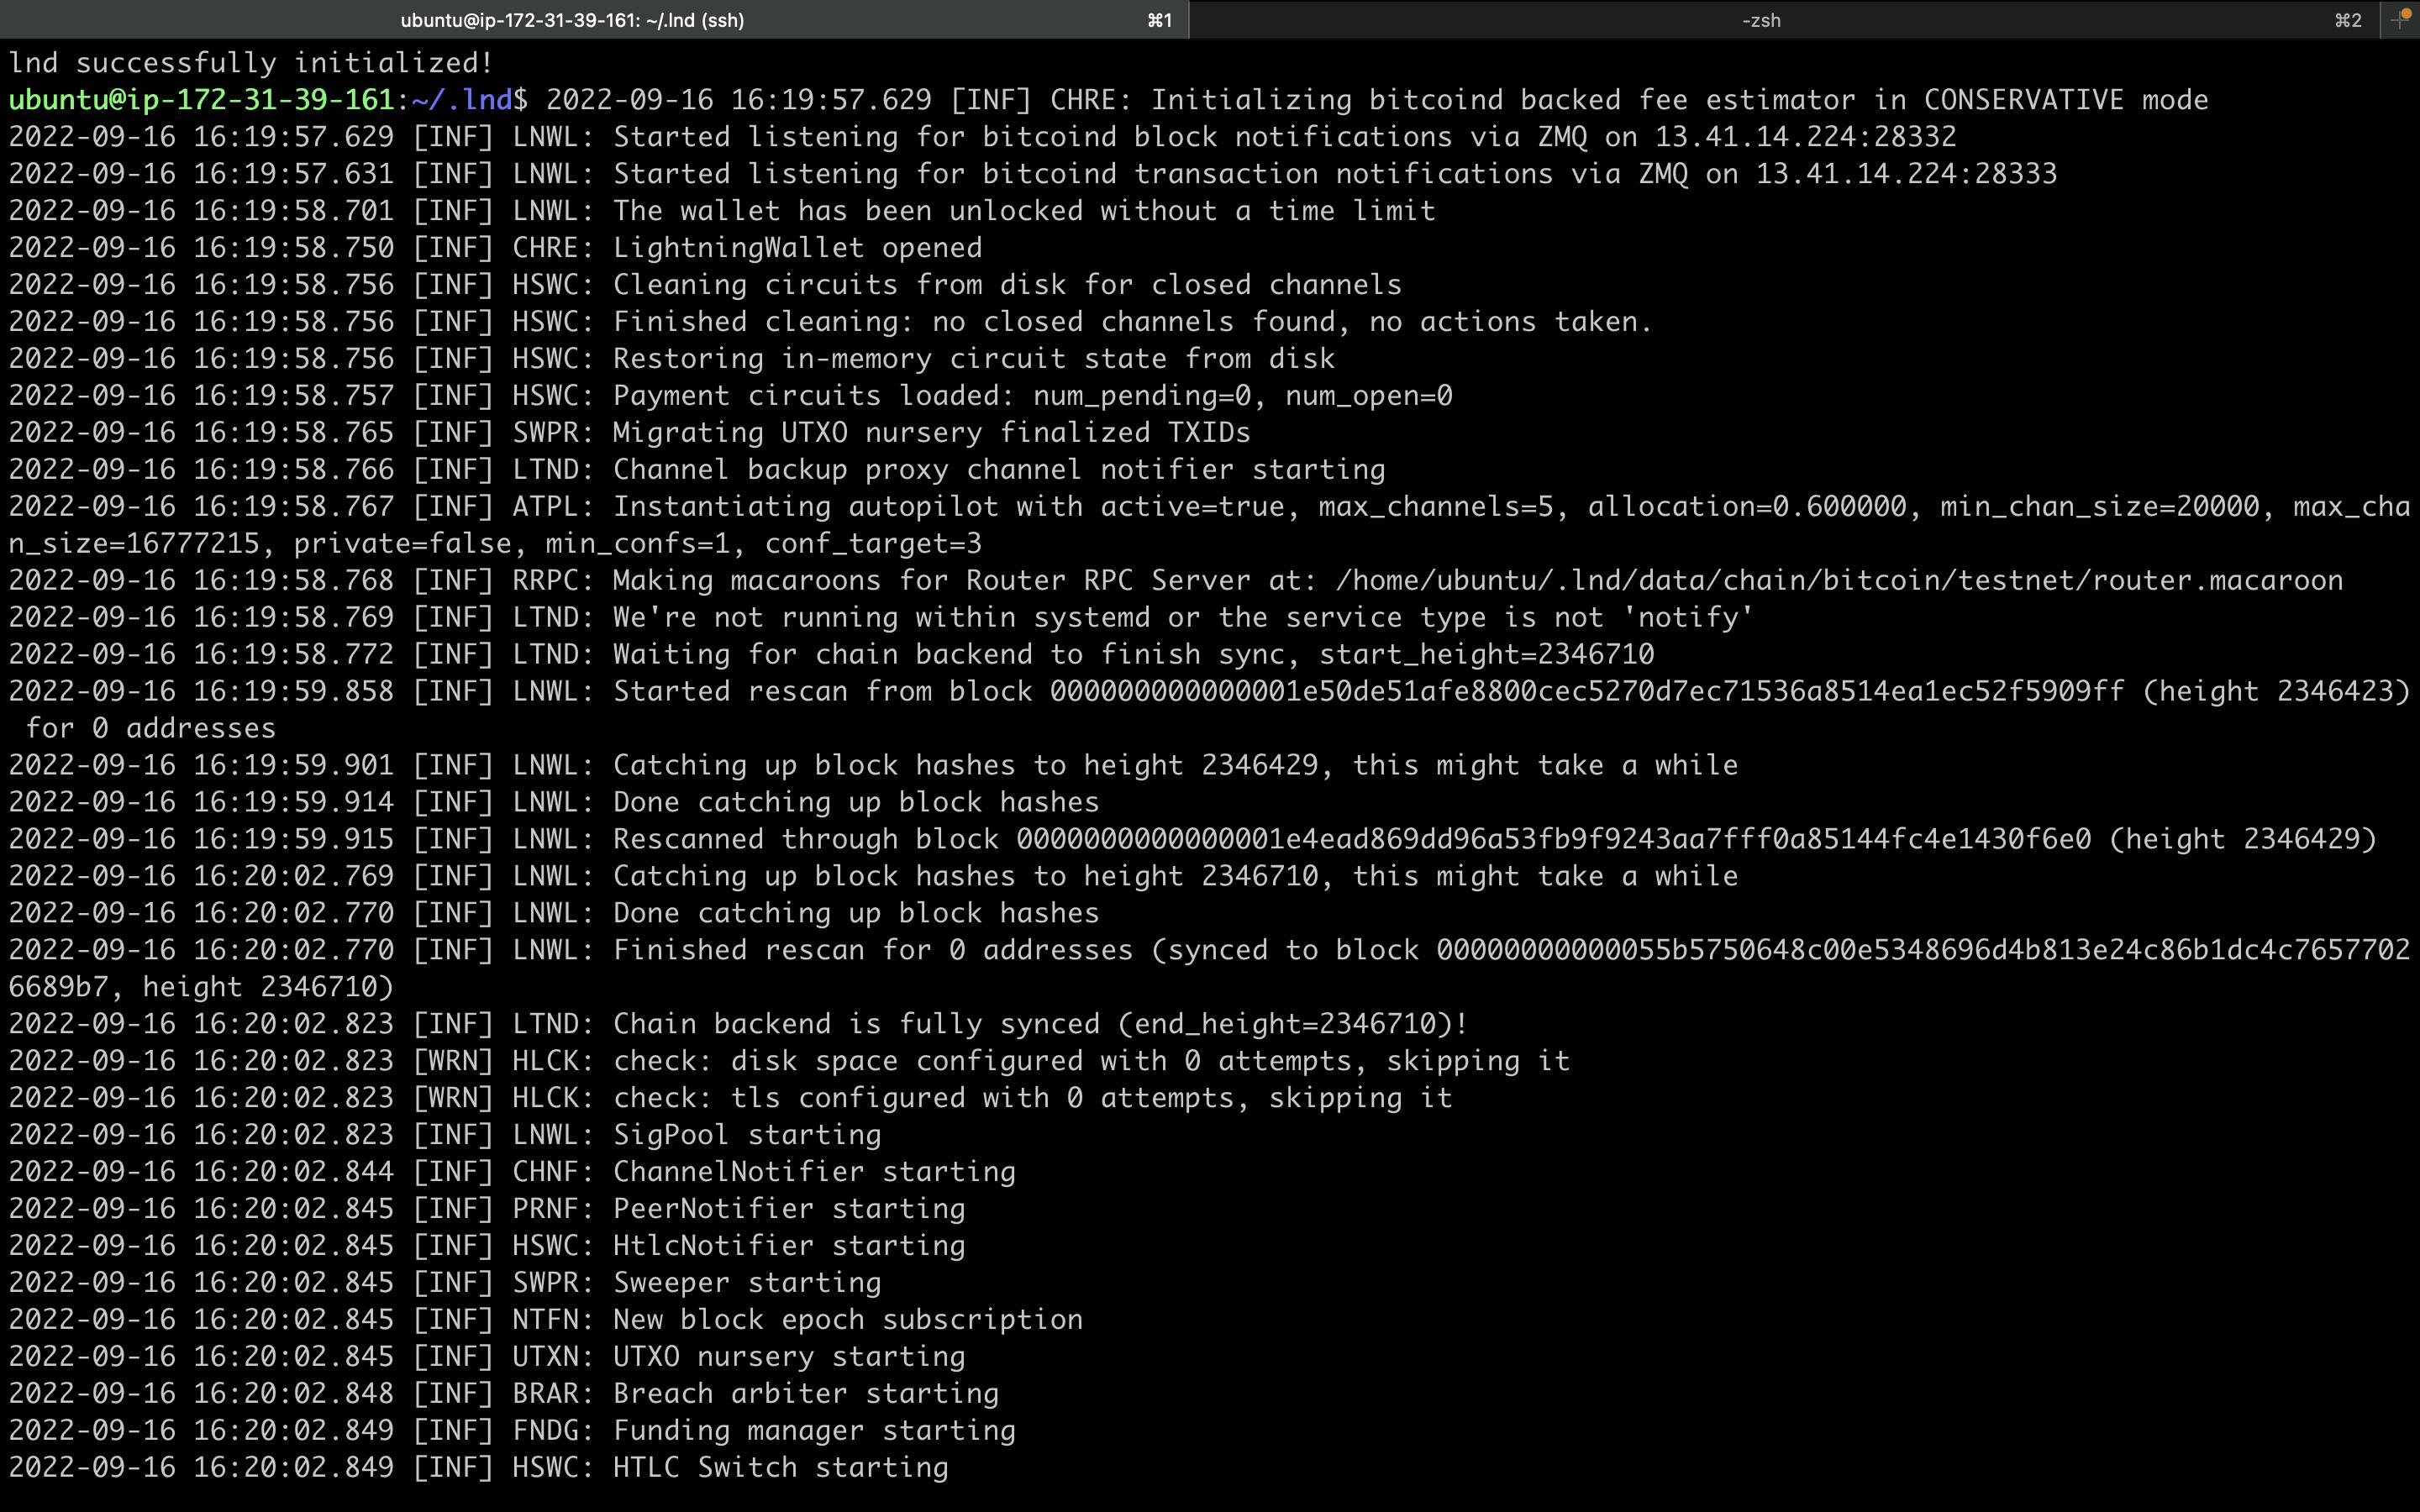
You can see if your network works by typing lncli -n=network getinfo and to get LND details(public_key....)
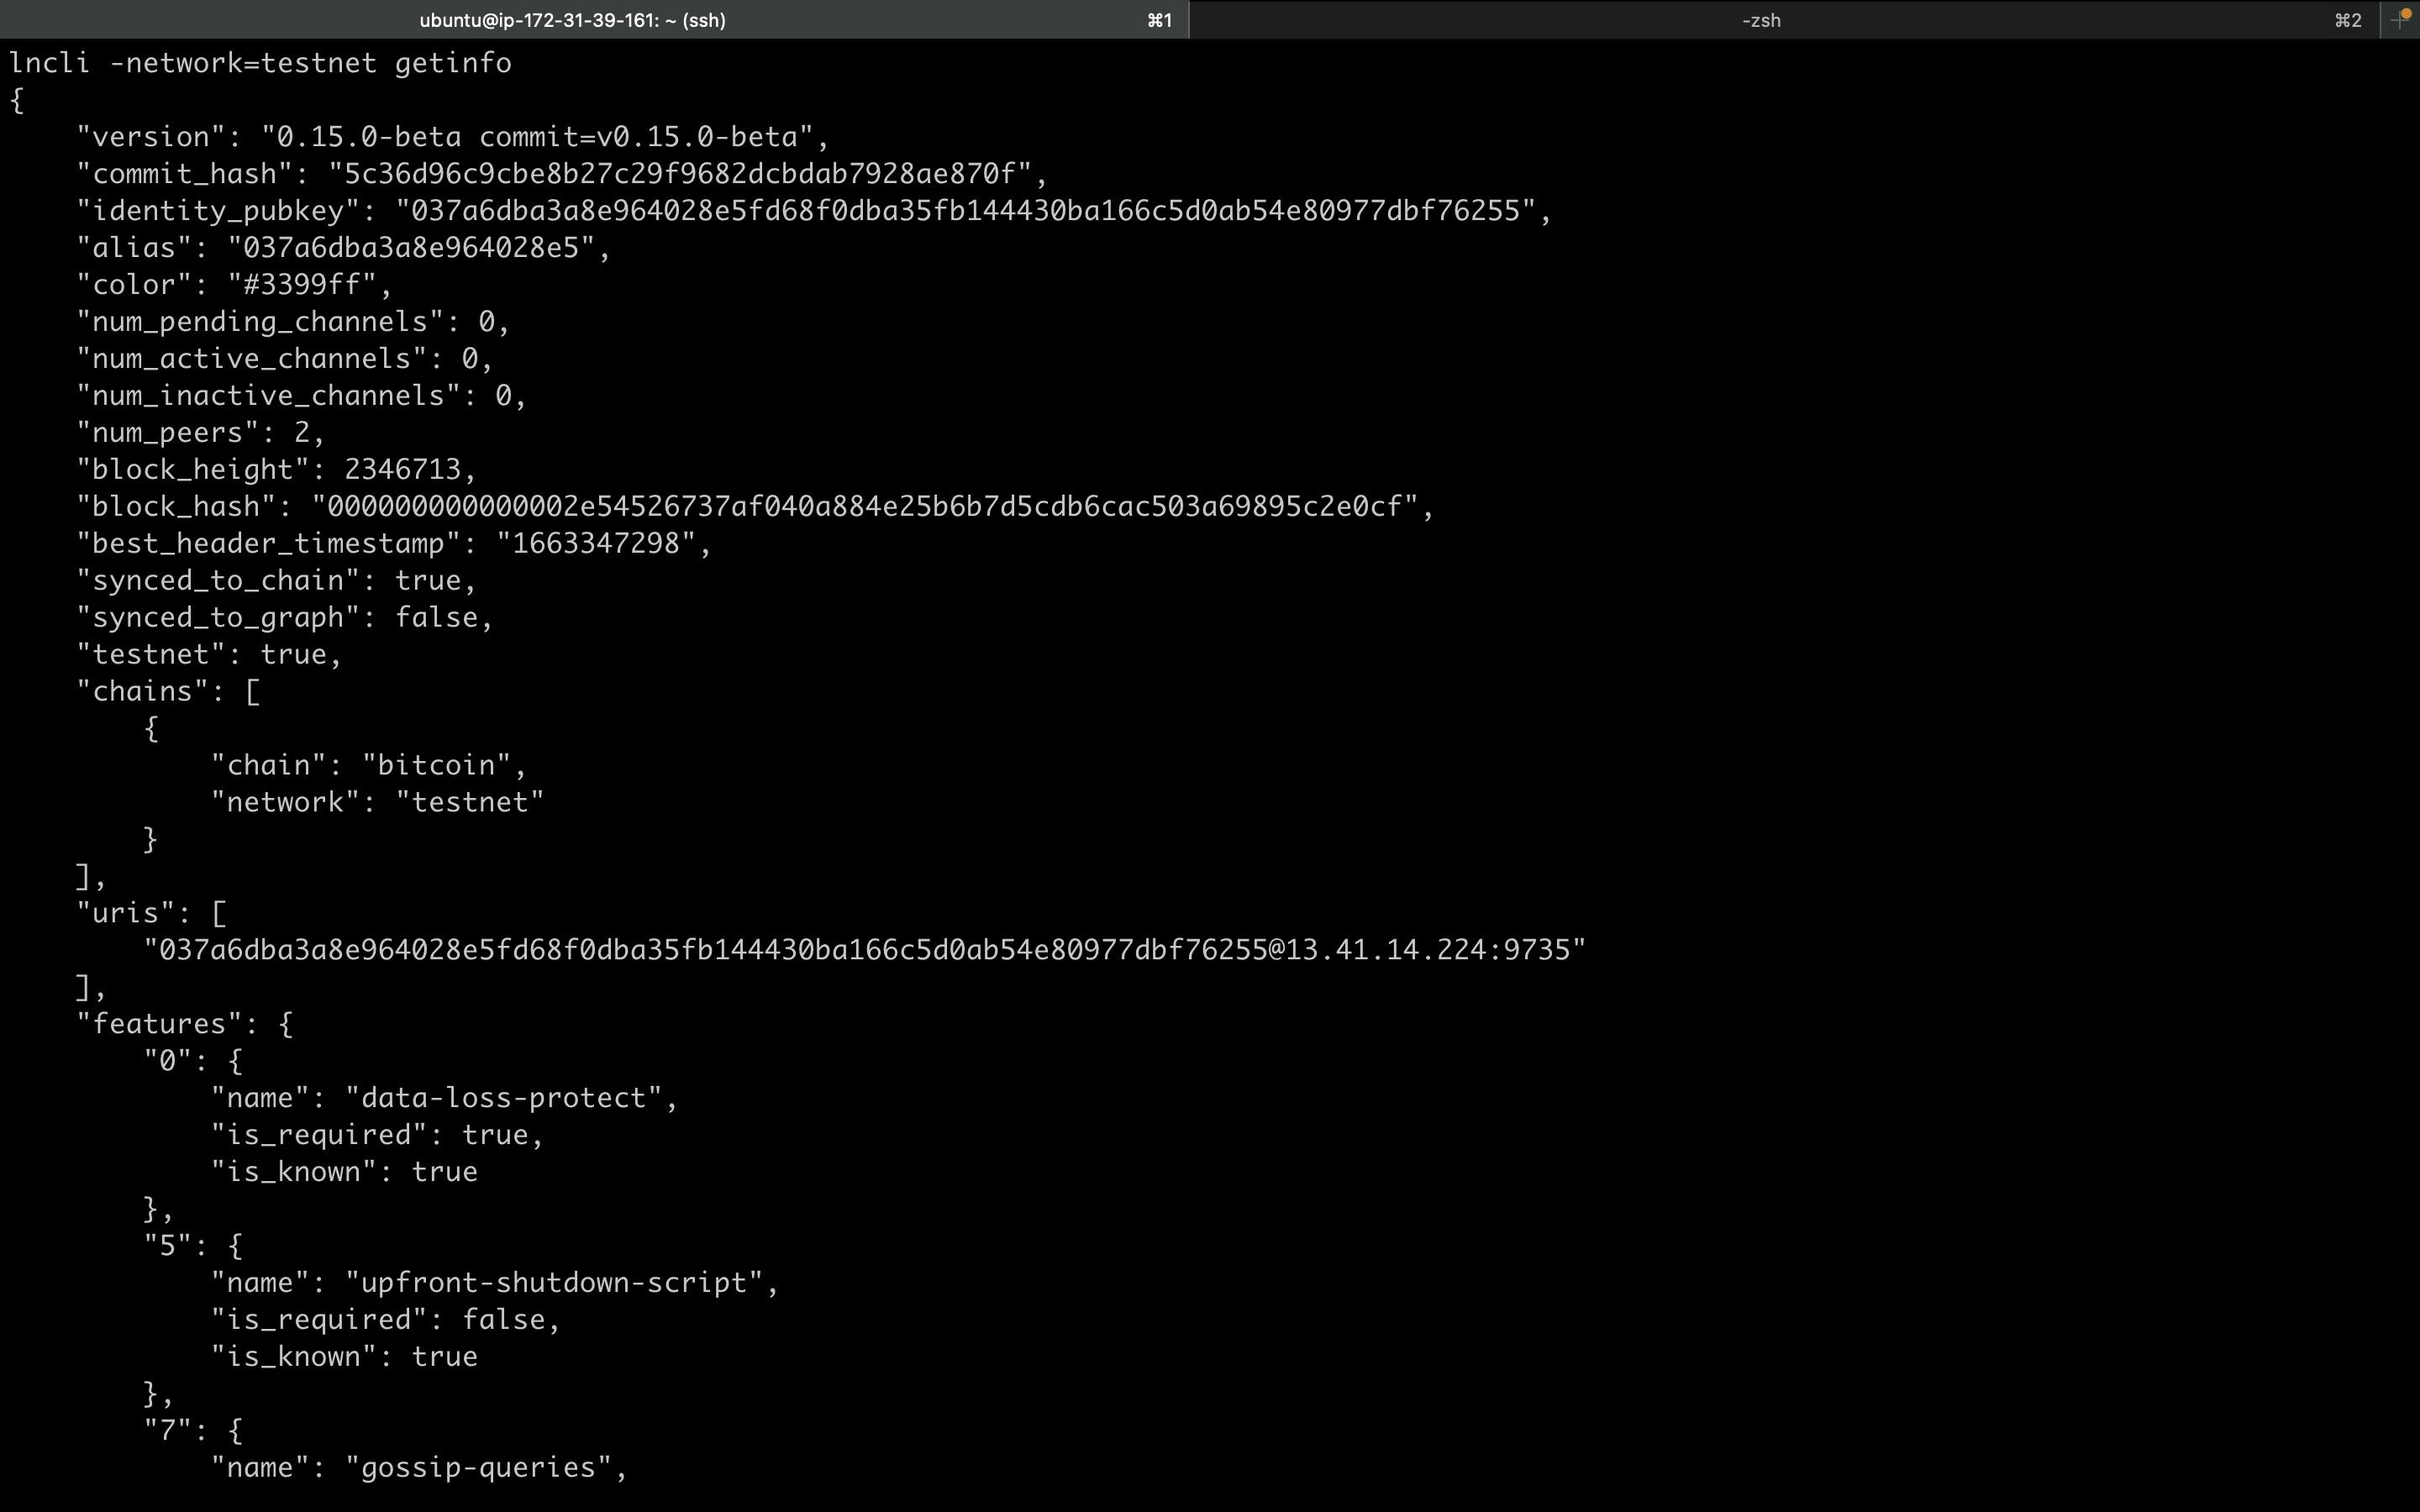
Hurray 🥳 🥳 🥳, your Lighting Network Deamon (LND) Node is up.
The lighting lab LND has an inbuilt command line tool called LNCLI and there is also an RPC library: ln-service that can be used to interact with the LND Node to create invoices and send payments. Setting up a Lightning Network Daemon (LND) Node is one thing making use of it to make transactions faster and cheap is another, this would be the end of part one in part two, I'll be showing you in detail how to use it.